I get asked this type of question all the time so I have laid out some of my favourites. Please use care when doing these exercises and stretches. If you are in doubt or if any of these are painful, please stop doing them and ask your coach or health professional for advice.
Everything is testable!
1. For each region, know what movement or lift you are going to use to see if this exercise works for you.
2. Do one of the exercises below on ONE SIDE ONLY.
3. Get up and retest that movement or lift.
4. Repeat Step 2 on the other side of your body.
5. The best exercise or the best place to release is the one that gives you the best release for the longest time.
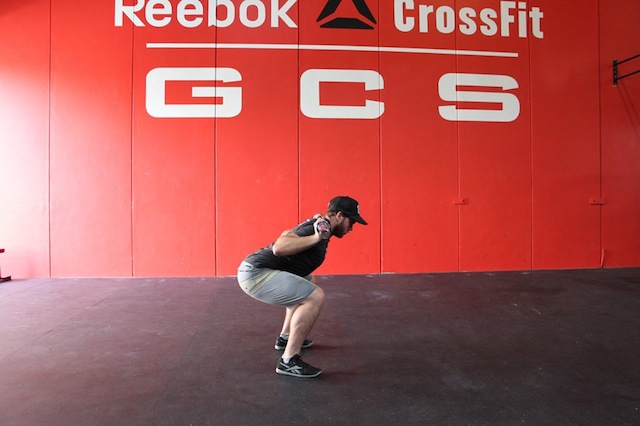
1. Squats with a Bar
These are mobility squats, not how to squat for reps with lots of load – talk to your coach about how they want you to squat.
Start Position
A. Back Squat, Front Squat or Overhead Squat
Focus on keeping:
1. Your feet straight like they are on train tracks – this will stretch your hips and ankles better and produce more torque and stability. Keep the weight even throughout the whole foot.
2. Your knees over your ankles. Once you are as low as you can go normally, you can then let your knees track over and past your toes.
3. Your hips will often run out of room and then you will start your “buttwink” (posterior pelvic tilt). Stop at a level so your buttwink doesn’t start. Doing this will allow you to begin stretching your deep hip rotators so you can get more hip flexion.
4. Your back straight – no butt wink or flexion in the back. Don’t overcook it into excessive extension either.
5. Your head and chin in line with your thorax – if you focus on a point on the wall, you will extend your neck as you go down. The object of this drill is to learn how to keep the relationship of your head and neck the same – in neutral.
6. Shoulders up and back (not DOWN and back).
7. You can do this with any weight up to about 50% of your 1RM.
8. In the photos, I have had Brendan stop where his hip range stops. Any lower and he will “butt wink”.
Finish Position for Back Squat with a Bar
B. Barbell on Knees at the Bottom of the Squat
The target of this exercise are your ankles. Use the bar or up to 60kg (135lbs – use caution!) to get a nice stretch. Set up as above then put the bar on your knees and get those knees over the feet and past your toes. Again, this is for flexibility and mobility, not squatting technique!
In the photo, I have had Brendon stop where his hips stop him. You can also do the variation where you round your back out and sit in the lowest possible squat. That works as well but I figured he needs to work on his hips at the same time.
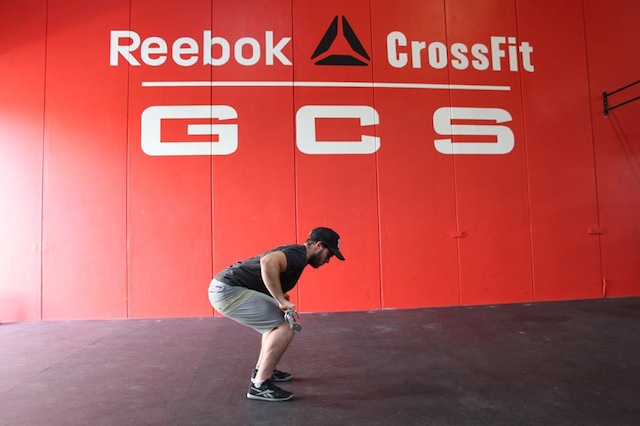
Barbell on Knees at the bottom of the squat
2. Hamstring+ Stretches
I like to keep my stretches functional if possible and not have to use leg stretching machines. This variation simulates the position you get into for your snatch and cleans. They are called “hamstring+” stretches because it isn’t only the hamstrings that get stretched!
1. Start with your knees bent forwards, back straight and the bar in your patella tendon (under the kneecap).
2. Keeping your back and neck nice and straight, push your knees back without bending your back.
3. Once you can get your knees straight with your back and neck straight, then you just have to maintain this flexibility.
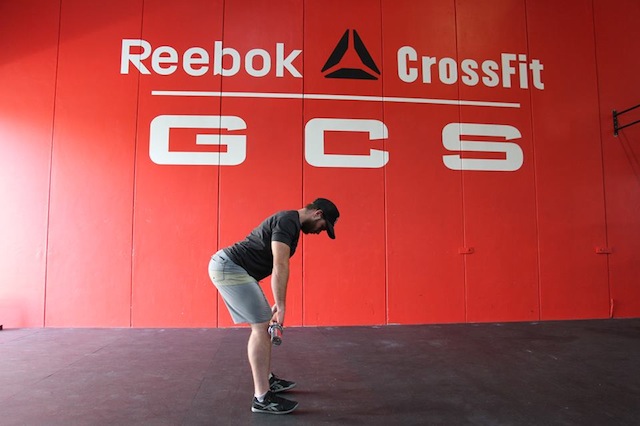
Finish Position for Hamstring Stretch
3. GIRD Stretch – Glenohumeral Internal Rotation Deficiency Stretch
The target of this stretch is the inferior glenohumeral ligament and posterior capsule. If too tight, they can cause problems with keeping the shoulder in the optimal position in its socket and then all sorts of injuries tend to occur – labral tears, rotator cuff strains and tears, tendonitis, impingement and generally sore shoulders.
1. Start lying on your side with your shoulders vertically stacked, your arm at 90 degree to your body and your elbow at 90 degrees.
2. Rotating from the shoulder, use your other hand at the wrist to gently stretch.
3. Your goal is between 0-20 degrees from the ground.
4. Make sure you don’t roll back – stay over the shoulder.
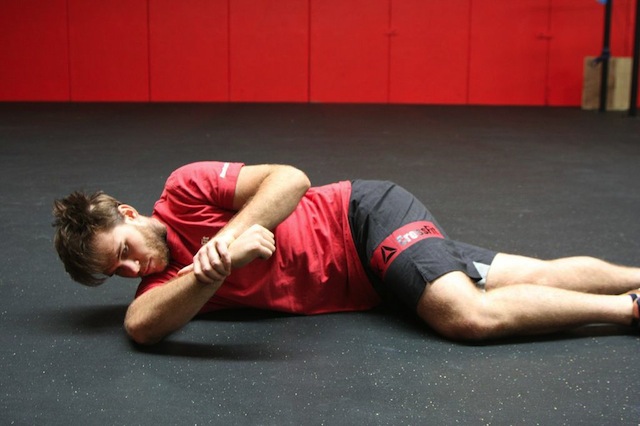
GIRD Stretch Glenohumeral Internal Rotation Deficiency Stretch
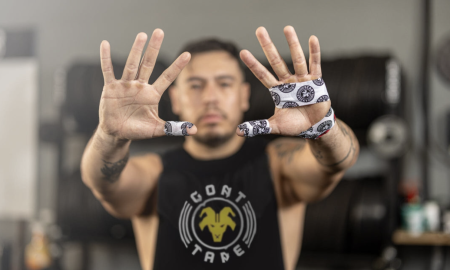
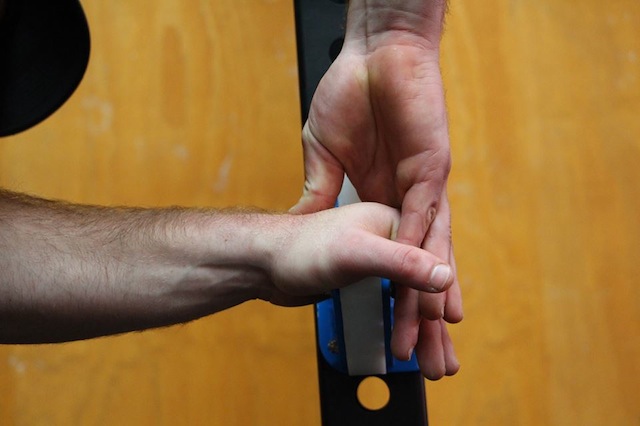
4. Wrist and Hand Self-Mobilisation
You have 14 phalanges, 5 metacarpals, 8 carpals, and 2 forearm bones that make up your hand and wrist. Where each bone meets another bone is a joint and therefore a potential source of stiffness.
Most people have a combination of joints that are quite stiff and some that are relatively loose. The goal is to have each joint doing its job properly so you can have optimum hand and wrist movement. I have significantly improved front rack positions simply by teaching my patients how to mobilise their joints.
1. In these pictures, we used a J-hook to lock down one part of the wrist. Brendon then used his thumb and index finger to glide the joints up and down.
2. Pick on the stiffest joints.
3. This is difficult to explain unless you have had it done… I will try to post a video of it soon on my YouTube channel “ThePhysioDetective.”
4. Just one minute on each hand will improved your front rack position.
Start position for wrist mobility into extension
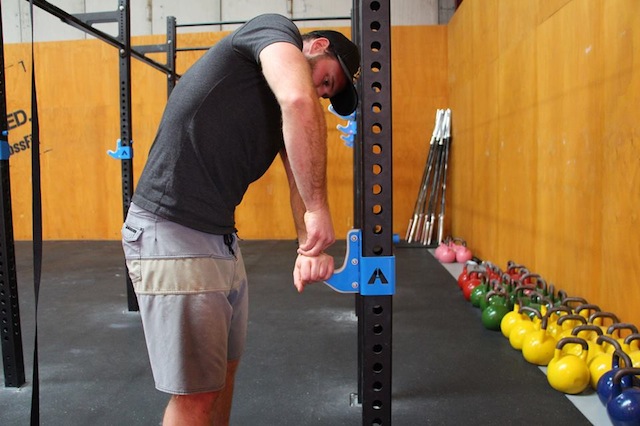
Position to glide the wrist bones into extension

Close up showing the finish position for the wrist mobility into extension – with movement
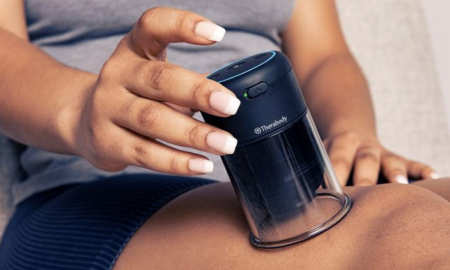
5. Releasing the Abs and Ribs
Often worked and never properly released. Overactive or shortened abdominals and serratus anterior muscles will affect your shoulder function.
1. Use a Kettlebell or dumbbell to get pressure onto your abdomen. Please use caution and go gently as you can injure your internal organs if you are too vigorous. Needless to say, I do NOT recommend this for pregnant women! I call this the “Kettlebell Shag”. 1-minute on each side is enough to feel a difference. If it works for you on your retest, do somemore!
2. Use a roller to get onto the ribs. Start from the bottom of the ribs lying on your side and slowly move up. At each sore spot, roll side to side like a log and up and down on the roller to work the sore spots. Spend only 10-15 secs on each sore spot as there are plenty of them to get. Do one side and then get up and retest before doing the other side.

Kettlebell shag with Brandon Swan

Rib roller with Brandon
![]()

Follow Us